Providing Expert Lawn Care to Aurora, Parker, Castle Rock, Castle Pines, Highlands Ranch, Lone Tree & Surrounding Areas.
QDS Logo

94%

Customer Satisfaction

from 2836 reviews


   69.6%
   17.3%
   7.1%
   3.4%
   2.6%

Dec 12, 2022

You all are the best

- Susan

Nov 11, 2022

They are doing a good job getting everything under control.

- Janet

Nov 8, 2022

Great service with great staff.

- Ken

Nov 14, 2022

All good

- Janet

Nov 8, 2022

BestYard have done our fall leaf clean up for a few years now and we really appreciate this service!! We have a dozen trees in our small backyard so over the years we have more and more leaves as we get older. BestYard are good at communication and getting the job done!

- Margeret

Nov 2, 2022

It was quick and our lawn looks great!

- Paul

Nov 8, 2022

Wonderful job, team. The fall yard cleanup was perfect and the house looks great again!

- Trent

Oct 27, 2022

Excellent service!

- Tonyetta

Oct 26, 2022

Thanks Weed Man for aerating our lawn! The guys were fast, friendly, respectful of directions and most of all, did a great job of taking care of readying our lawn for winter and into the spring. Thanks so much for texting the day before to remind us of appointment!

- Ryan and Roxanne

Oct 25, 2022

Excellent customer service!!

- Lisa

Customer Rating
Bestyard Video
Beautiful-Lawn
Family-on-the-lawn
Mulch-1
previous arrowprevious arrow
next arrownext arrow

Our Blog

Decorate Planters for Winter

Introduction:
Transforming your winter landscape doesn’t have to involve waiting for spring blooms. Even in the coldest months, your outdoor space can remain vibrant and engaging, especially if you have sizable planters. In this guide, we’ll explore creative ways to infuse color and interest into your winter containers, ensuring they become eye-catching focal points that stand out against the dormant backdrop of the season.

  • Section 1: Utilize Colorful Containers
    A simple yet effective way to elevate your winter landscape is by selecting brightly colored ceramic pots for your planters. These containers can serve as decorative elements in themselves, bringing a cheerful touch to your porch or stoop. Whether you opt for bold reds, blues, or lively patterns, the vibrancy of these containers will contrast beautifully with the muted tones of winter.
  • Section 2: Create a Seasonal Arrangement
    Even if your containers feature more subdued colors, you can still inject excitement without relying on fresh flowers. Take inspiration from summer gardening by employing the “thriller, filler, spiller” technique. Choose long branches like dogwood as your “thriller” element, providing height and drama. Fill the spaces with pinecones, artificial flowers, or holiday ornaments to add texture and visual interest. Lastly, position evergreens or garland strategically to spill over the sides, creating a dynamic and lush composition.
  • Section 3: Source Natural Elements
    If your yard lacks pinecones or branches, consider a trip to your local garden center to gather natural elements that can enhance your winter containers. Pinecones, in particular, add a rustic charm, while branches contribute an organic, textured feel. For an extra touch of whimsy, introduce garden gnomes or vibrant sculptures that complement the winter aesthetic. These additions not only personalize your containers but also bring a playful spirit to your outdoor space.
  • Section 4: Illuminate with Lights
    Combat the winter darkness by incorporating lighting elements into your containers. String lights, in the form of a ball or draped gracefully over the arrangement, can fill the space and provide a warm, inviting glow. This not only enhances the visual appeal of your containers but also extends the enjoyment of your outdoor space well into the evening hours.
  • Section 5: Think Beyond Traditional Decor
    Challenge your creativity by exploring unconventional items to adorn your winter containers. Repurpose vintage items, such as old watering cans or wooden crates, as unique and rustic planters. Consider incorporating non-traditional materials like colorful glass beads or seashells for an eclectic touch. Embrace the opportunity to experiment and discover unexpected combinations that showcase your personality and style.

Conclusion:
Don’t let your planters succumb to winter’s dormancy. Instead, turn them into captivating focal points that defy the season’s subdued palette. Whether through vibrant containers, seasonal arrangements, natural elements, whimsical additions, or creative lighting, your winter containers can be a testament to your gardening ingenuity. By implementing these ideas, you’ll not only add visual interest to your outdoor space but also create a welcoming environment that will be the envy of your neighborhood throughout the winter months.


Click “DO IT FOR ME” to request a FREE quote.

Source: customer-service@bestyard.com in collaboration with Associated Landscape Contractors of Colorado


Fresh Holiday Greenery Guide


Introduction

The holiday season brings a magical ambiance filled with enchanting scents and the vibrant appearance of fresh greenery. Cedar, pine, spruce, mistletoe, and boxwood are not just decorations; they’re essential elements that add a unique charm to the festive season. In this comprehensive guide, we’ll explore effective practices to preserve the freshness of these holiday greens, ensuring they remain vibrant throughout the season.

  • The Charm of Fresh Holiday Greenery:
    The appeal of fresh holiday greenery lies in its captivating scent and the visual delight it brings. The rich green hues of cedar, pine, and spruce and the timeless elegance of mistletoe and boxwood create a festive atmosphere, transforming any space into a winter wonderland. To maintain this allure, preserving the moisture within the foliage is crucial.
  • Preservation Techniques for Prolonged Freshness:
    Adopting effective preservation techniques is essential to extend the vibrancy of cut greens in your home.  The preservation process begins with the simple yet impactful step of recutting the stems and immersing the greenery in water overnight. This practice applies to cut boughs, garlands, and wreaths, and can be efficiently executed using a galvanized tub or your bathtub. For arrangements in water, an additional method involves recutting the stems and introducing glycerin into the water. The recommended ratio of 1 part glycerin to 1 part water ensures that the needles of the greenery remain soft and pliable. Glycerin, a readily available substance at your local drugstore, becomes an asset in preserving your holiday greenery’s natural texture and freshness.
  • Glycerin: A Natural Preservative for Holiday Greenery:
    Glycerin, a versatile and readily accessible substance, is a game-changer in preserving the beauty of your holiday greenery. Besides maintaining needle softness, glycerin is a natural humectant, helping the greenery retain moisture. Its application is simple, making it an ideal solution for enhancing the longevity of your festive decorations.
  • Anti-Transpirant Spray: A Protective Shield for Your Greenery:
    An additional and highly effective strategy to retain moisture in holiday greenery is using an anti-transpirent spray readily available at garden centers. This specialized solution acts as a protective barrier, preventing excessive moisture loss and enhancing the overall freshness of your greenery. Applying the spray protects against environmental factors, ensuring your holiday decorations remain vibrant throughout the holiday season.

Conclusion:
Preserving the freshness of holiday greenery is not just about aesthetics; it’s about creating a lasting and memorable festive ambiance. By adopting simple yet effective practices such as stem recutting, water immersion, glycerin application, and the use of anti-transpirent sprays, you can ensure that your cedar, pine, spruce, mistletoe, and boxwood decorations remain vibrant throughout the holiday season.

Incorporating these preservation techniques into your festive preparations guarantees a visually stunning and enchanting atmosphere that captures the true spirit of the holidays. May your holiday season be filled with the timeless beauty of fresh greenery, creating cherished moments and lasting memories for years to come.


Click “DO IT FOR ME” to request a FREE quote.

Source: customer-service@bestyard.com in collaboration with Associated Landscape Contractors of Colorado

A Comprehensive Guide to Fall Iris Care

Introduction
As the vibrant hues of autumn surround us, it’s the perfect time to channel our gardening enthusiasm towards one of nature’s most captivating beauties – irises. The golden leaves, and the crisp morning air – all sets the stage for enhancing your garden with these enchanting flowers. In this guide, we’ll delve into the world of fall iris care, exploring essential tips to ensure your irises thrive during this season and beyond.

  1. Fall Iris Care: A Seasonal Renewal
    The fall season offers a unique opportunity to care for your irises, setting the groundwork for a splendid bloom in the coming months. By strategically planting new iris varieties during this time, you provide them with the ideal conditions to establish roots before winter takes hold. Let’s explore the steps to ensure your irises receive the care they deserve.
  2. Cleaning: A Fresh Start for Your Irises
    Commence your fall iris care routine by eliminating any diseased leaves and leaf litter. Dispose of these in the trash to prevent the over-wintering of fungi spores. Trim healthy leaves back to approximately 6″ from the rhizome, cutting at an angle to prevent rainwater pooling and potential rot. Shaping the leaves into a rounded fan not only enhances aesthetics but also promotes tidiness. Dedicate some time to weeding, as a small effort now can save you considerable time in the spring.
  3. Inspecting: Ensuring Rhizome Health
    With your irises cleaned and trimmed, carefully inspect the rhizomes for any soft spots. If detected, promptly dig up the affected rhizome and trim away decayed portions until only healthy tissue remains. Removing rot is crucial for protecting the entire rhizome and ensuring a robust foundation for future growth.
  4. Mulching: Winter Protection for Irises
    Emphasize the importance of a protective winter covering, especially for gardeners in colder regions. Choose light and loose materials such as straw, marsh hay, or pine needles. This covering acts as a buffer against the potentially damaging freeze-thaw cycle, providing vital insulation. For late-planted irises, consider placing a brick atop the rhizome after the first hard freeze to prevent upheaval. When new growth emerges in spring, it’s time to remove the cover and unveil your thriving irises.
  5. Other Tips: Planning for the Future
    Beyond the immediate care, consider the long-term health and vitality of your iris garden. Keep a gardening journal to record observations about thriving and struggling plants. Anticipate future needs, such as the potential movement or division of plants in the next season. Take this opportunity to sketch your garden, noting areas that are dry, wet, sunny, or shady. This comprehensive guide will serve as a valuable resource for your future planting endeavors.

Conclusion
As autumn unfolds its beauty, take joy in nurturing your garden with dedicated fall iris care. By following these tips, you’re not only ensuring the current health of your irises but also laying the groundwork for a lush and vibrant garden in the seasons to come. Here’s to another season of blooming gardens, with green thumbs active and hearts passionate.


Click “DO IT FOR ME” to request a FREE quote.

Source: customer-service@bestyard.com in collaboration with Associated Landscape Contractors of Colorado

Winter Lawn Care: Protect Your Grass from the Chill


Protect your lawn from winter kill caused by extreme cold. Discover preventative measures to safeguard your grass from harsh temperatures. As temperatures drop, we bundle up while our lawns face the brunt of the cold. While most lawns adapt to winter, severe temperature drops can lead to what’s known as winter kill.

Although entirely preventable, there are steps you can take to fortify your lawn against frigid conditions. Let’s explore the various forms of winter lawn damage and discuss how to prepare your lawn for the colder months ahead.

Does Grass Perish in Winter?

  • During winter, your lawn enters a dormancy phase—akin to hibernation. With shorter days and limited sunlight, plants conserve energy to endure freezing temperatures and lack nutrients. While your grass might appear discolored and thin, this dormancy period shields it from harsh winter conditions, allowing it to flourish green and lush year after year.
  • How Cold Weather Affects Lawns: Ordinary winter weather prompts dormancy, with your lawn bouncing back in spring. However, extreme cold or prolonged snow cover might lead to significant winter lawn damage.
  • Winter Kill and Other Damages: Winter kill, the most concerning damage, occurs when plants die due to harsh winter conditions. While cool-season grasses handle the cold better, various factors such as grass type, location, and prolonged cold influence your lawn’s health.
  • Identifying Winter Damage: From ice damage to snow mold, different types of damage can affect your lawn:
  • Ice Damage: Thick ice layers suffocate grass by preventing oxygen access and hindering water absorption, leading to potential winter kill. Adjusting fertilizer for warm-season grasses before the frost can minimize new growth susceptibility.
  • Desiccation: Cold, dry winds dehydrate grass, potentially causing winter kill. Maintaining a regular watering schedule in the fall can reduce desiccation.
  • Snow Mold: Prolonged snow cover can lead to a fungal lawn disease. Shortening grass height before winter and removing snow piles can prevent snow mold.
  • Crown Hydration: Repeated thawing and freezing cycles can cause ruptured cell membranes, visible as discolored turf in poorly drained areas.
  • Preventing Winter Damage: Planning in the fall with proper watering, mowing, and fertilization can help your lawn withstand winter.
  • Reviving Your Lawn Post-Winter: While winter may leave your lawn discolored or sparse, solutions exist. BestYard Secrets stands ready to help your lawn flourish come spring.


Click “DO IT FOR ME” to request a FREE quote.

Source: customer-service@bestyard.com in collaboration with Associated Landscape Contractors of Colorado

Embrace Greenery And Fresh Flavors With An Indoor Herb Garden This Winter


The cold winds of winter may have ended your outdoor gardening adventures. But you don’t need to bid adieu to your beloved green thumb. This fall and winter, why not embark on an exciting journey into indoor herb gardening?

With the right conditions, a windowsill herb garden can be a delightful and rewarding experience, requiring minimal time and effort. All you need is a sunny spot, and you’ll have the opportunity to cultivate an herb garden that provides fresh flavors to enhance your meals throughout the chilly months.

Let’s delve into the basics of creating and nurturing an indoor herb garden, so you can enjoy a thriving mini-Eden in your home.

  • Light

Herbs thrive on light, so one of the critical factors for success in indoor herb gardening is providing the right amount of sunlight.

To ensure the best possible growth, position your herb plants in a spot where they will receive full and direct sunlight for at least six hours each day. This requirement is vital for their photosynthesis and overall health.

  • Watering

Proper watering is crucial in maintaining the well-being of your indoor herbs. Most herbs prefer soil that is consistently moist but well-drained to prevent root rot. Be cautious about watering your container herbs appropriately, which can lead to this undesirable condition. To avoid such issues, use containers with adequate drainage holes and always check the soil’s moisture level before watering. When you do water, remember to apply it at the base of the Plant rather than on top to prevent waterlogging.

  • Containers

The choice of containers can significantly impact the success of your indoor herb garden.  Different types of containers have unique characteristics that you should be aware of. Clay pots, for example, promote excellent air circulation around the roots, but they tend to dry out faster and may require more frequent watering. In contrast, glazed ceramic pots have a more limited air circulation but are excellent at retaining moisture. Understanding the properties of your chosen container will help you manage your watering schedule effectively.

Herbs to Consider

Now that you have the basic principles in mind, let’s explore some herb varieties that are well-suited for indoor gardening:

  • Chives

Chives are perfect candidates for container gardening, and they can be easily moved between indoor and outdoor settings with the changing seasons. To ensure their well-being, make sure the soil is not consistently wet. When harvesting, always pick the leaves from the outer part of the plant to encourage continuous growth.

  • Dill

Dill is often best started from seeds because it doesn’t transplant well. As your dill plants mature, thin the seedlings to prevent overcrowding. This will help each plant develop more effectively.

  • Parsley

Parsley is another herb that thrives when grown indoors. To prolong its growth, harvest small amounts at a time and trim back any flowers as soon as they appear. Remember that parsley leaves lose their flavor after the plant has bloomed.

  • Cilantro

If you have a spacious window box for growing herbs, consider planting dill, cilantro and parsley together, as they share similar water requirements. This approach makes it easier to manage their care. When spring arrives, you can continue growing them in Containers or transplant them into your outdoor garden.

In conclusion

The winter season doesn’t have to mean the end of your gardening endeavors. With proper care and attention, you can nurture a thriving indoor herb garden that not only adds a touch of greenery to your home but also provides a fresh and flavorful addition to your culinary creations. So, why wait? Get started on your indoor herb garden journey today, and let the aroma and taste of fresh herbs enrich your winter days.


Click “DO IT FOR ME” to request a FREE quote.

Source: customer-service@bestyard.com in collaboration with Associated Landscape Contractors of Colorado

The Art of Planting Spring Bulbs: Tips for a Bountiful Blooming Garden

Blooming Garden


As we enter the season of anticipation and preparation, where nature paints a canvas with vibrant hues, it’s time to think ahead to spring.

Have you planted your spring-flowering bulbs yet? If not, don’t worry; there’s still time to embrace the joys of gardening and ensure your garden bursts into a riot of colors as soon as the last frost melts away.

Planting bulbs allows them to develop strong roots before the harsh grasp of winter. But there’s more to it than digging a hole and dropping in a bulb.

This article will guide you through the process and help you decide which bulbs to choose and how to plant them.

The Early Bird Gets the Bulb

Before diving into the “do’s” and “don’ts” of planting spring bulbs, let’s talk about the importance of timing. The moment you put a bulb in the ground plays a pivotal role in determining when your garden will come to life. So, the first tip of the week is to consider whether you’ve planted your bulbs in time.

Tip of the Week: Planting Bulbs in Autumn

As the days grow shorter and the air becomes crisper, seasoned gardeners know it’s time to think about the beauty that spring will bring. If you haven’t planted your spring bulbs yet, you might be in luck—there’s still time. Planting in the fall gives your bulbs the perfect window to establish their roots before the ground freezes.

With careful planning and consideration, this easy project can bring immense joy and vibrant colors to your garden come spring.

The Do’s and Don’ts of Planting Bulbs

Now that you know the importance of timing, it’s time to delve into the “do’s” and “don’ts” of planting bulbs for a successful spring garden.

  • Choose the Right Location

The first step in planting spring bulbs is selecting the perfect location. Bulbs thrive in well-drained soil and plenty of sunlight. Find a spot in your garden that receives at least 6 hours of daylight daily. The right location will ensure your flowers receive the energy they need to bloom beautifully.

  • Plan Your Planting Around Bloom Time

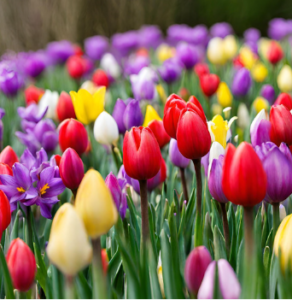
Spring bulbs offer a diverse range of bloom times. Daffodils and crocuses are among the early risers, gracing your garden with their colors at the beginning of the season. Tulips, on the other hand, make their grand entrance a bit later.  To create a harmonious progression of colors, check with your bulb seller to learn the expected bloom times for each variety and plan your planting accordingly.

  • Mix It Up with Variety

While tulips and daffodils are classic choices, consider adding some diversity to your garden with less common options. Early-blooming snowdrops (Galanthus), with their dainty white bells, can create a unique and charming display. Additionally, late-blooming giant allium, resembling oversized ornamental onions with their purple heads on tall stalks, can add a touch of drama to your garden.

  • Water After Planting

Once you’ve nestled your bulbs into the soil, please give them a good drink. This initial watering helps the bulbs settle into their new home and establish roots. It’s a crucial step in ensuring their success.

  • Do Not Plant Bulbs in Rows

It might be tempting to plant your bulbs in neat rows, but this method can lead to an uninspiring result if some bulbs fail to bloom. Instead, try grouping them in pockets or clusters of 10-12 bulbs. This way, you’ll enjoy a burst of color next spring, even if a few bulbs decide to take a break.

  • Do Not: Plant All Bulbs the Same Way

Different bulbs have different spacing requirements. Large bulbs, like tulips and daffodils, should be spaced about 6 inches apart, which means you’ll need around five bulbs per square foot. Smaller bulbs, such as crocus and grape hyacinth or miniature daffodils, can be placed about 4 inches apart, requiring eight small bulbs per square foot of garden area. Ensuring proper spacing is essential to avoid overcrowding and competition for resources.

  • Do Not Forget to Fertilize and Top-Dress

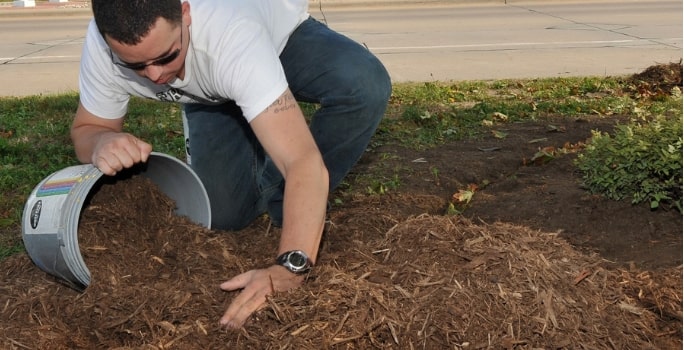
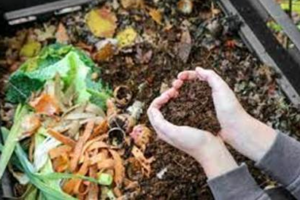
To help your bulbs establish strong roots and ensure healthy growth, use a fertilizer high in phosphorous when planting. This essential nutrient aids in root development and encourages robust flowering. After planting, top-dress the beds with shredded wood mulch or mulched leaves to provide insulation, retain moisture, and protect your bulbs during the winter.

The Bulb Planting Process

To give you a deeper look at the bulb planting process, let’s break it down into a few easy steps.

  • Choose Your Bulbs: Start by selecting the bulbs you want to plant. Consider your local climate and soil conditions when making your choice.
  • Select the Right Spot: Find a location in your garden that receives ample sunlight and has well-drained soil. Prepare the ground by loosening it and adding compost for added nutrients.
  • Dig Holes: Dig holes or trenches for your bulbs. The depth of the hole should be approximately three times the bulb’s height. Place large bulbs like tulips and daffodils about 6 inches apart and smaller bulbs like crocus about 4 inches apart.
  • Plant the Bulbs: Position each bulb with its pointy end facing up. Cover the bulbs with soil and gently press down to remove air pockets. Water the area thoroughly to help the bulbs settle and initiate root growth.
  • Fertilize: As mentioned earlier, use a fertilizer high in phosphorous to aid root development. Apply it when planting.
  • Top-Dress: After planting, add a layer of mulch to help insulate the soil and protect the bulbs during the winter months.

Choosing the Right Bulbs

The success of your spring garden largely depends on your bulb selection. Here are some popular spring-flowering bulb varieties to consider:

  • Tulips: With their vast array of colors and shapes, tulips are a garden favorite. From classic red and yellow to unique parrot tulips, there’s a tulip for every garden.
  • Daffodils: Daffodils, also known as narcissus, are easy to grow and come in various sizes and colors. They’re known for their cheerful yellow and white blossoms.
  • Crocuses: These small but charming flowers are among the first to bloom in spring, often pushing through the last remnants of winter’s snow.
  • Hyacinths: Hyacinths are known for their fragrant blooms and vibrant colors and make a delightful addition to any garden.
  • Alliums: Alliums, including the giant alliums, are unique and attention-grabbing with their globe-shaped purple flowers.
  • Snowdrops: Snowdrops are one of the earliest spring flowers to emerge, with delicate white petals that resemble tiny bells.
  • Grape Hyacinth: These charming little bulbs produce clusters of small, grape-like flowers, often in shades of blue and purple.

Enhancing Your Garden

To take your bulb planting to the next level, consider the following tips for enhancing your garden’s overall appeal:

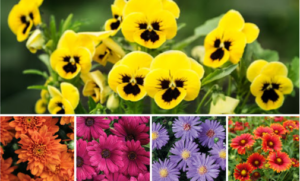
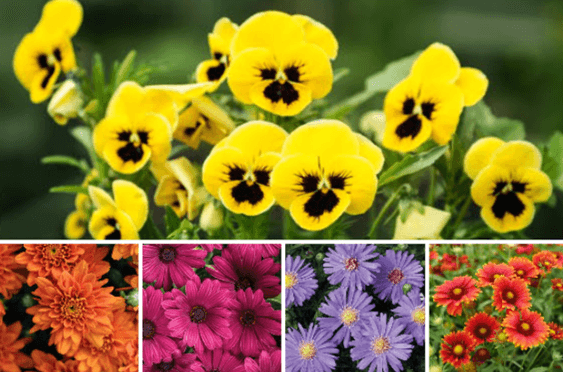
  • Color Schemes: Plan your bulb planting to create color schemes that complement each other. For example, you could combine pink and white tulips for a romantic theme or mix bright yellow daffodils with deep purple hyacinths for a striking contrast.
  • Layering: Experiment with layering different types of bulbs in the same area. Plant larger bulbs deeper and smaller bulbs above them. This technique not only maximizes your space but also creates a visually exciting garden.
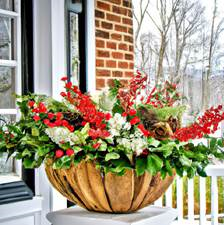
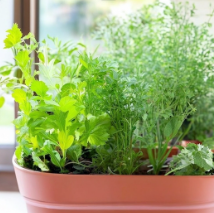
  • Bulbs in Containers: If you have limited garden space or want to add a pop of color to your patio, consider planting bulbs in containers. Choose decorative pots or boxes and follow the same planting guidelines for the garden.
  • Maintenance: Once your bulbs bloom in the spring, remember to deadhead (remove faded flowers) to encourage the plant to put more energy into growing and storing nutrients for the following year. Allow the foliage to die back naturally, as it nourishes the bulbs.

Conclusion: The Promise of Spring

Planting spring bulbs is a rewarding and joyful endeavor, and with the proper knowledge and careful planning, you can look forward to a garden that bursts into life with a tapestry of colors come spring. So, if you still need to plant your bulbs, it’s not too late. Follow the “do’s” and “don’ts” of bulb planting, select the suitable varieties for your region, and prepare to be dazzled by the beauty that nature has in store for you.

Embrace the promise of spring, and let your garden bloom with the vibrant artistry of these flowering bulbs. As you watch the first shoots emerge from the soil and the petals unfurl,

you’ll be grateful for the time and effort you put into planting those bulbs during the crisp, cool autumn days. Spring will arrive, and with it, the assurance that nature’s cycles will continue, bringing life, beauty, and renewal to your garden and spirit.


Click “DO IT FOR ME” to request a FREE quote.

Source: customer-service@bestyard.com in collaboration with Associated Landscape Contractors of Colorado

Composting Yard Waste: A Sustainable Practice for Your Garden and Environment


As the seasons transition and the growing season ends, many homeowners face the annual challenge of managing yard waste. Fallen leaves, grass clippings, straw, and various plant debris accumulate as we prepare our landscapes for the winter months. Instead of resorting to the conventional method of bagging and disposing of these materials in landfills, there’s a more environmentally friendly and beneficial approach: composting.

Composting is not just an eco-conscious activity; it’s a practical way to recycle organic matter and enrich your garden’s soil. This article will explore the benefits of composting, what to include in your compost pile, what to avoid, and how to make the most of this valuable resource.

The Magic Ingredients of Compost:

  • Leaves: Fallen leaves are a staple in any compost pile. They provide an excellent carbon source and help create the right balance of materials needed for effective composting.
  • Grass Clippings: If you’ve been mowing your lawn, those grass clippings can also find a home in your compost bin. They provide nitrogen and help speed up the decomposition process.
  • Straw: Straw is a fantastic addition as it offers structure to your compost pile, helping with aeration and moisture retention.
  • Plant Debris: Any plant matter from your garden, such as pruned branches, spent flowers, or garden trimmings, can be composted. These items are rich in organic matter and produce a nutrient-rich final product.

Going Beyond the Basics:

While tending to your compost pile, consider adding kitchen scraps like coffee grounds, fruit peels and cores, and vegetable scraps. These materials are a great source of organic matter and add diversity to your compost mix.

Caution: What Not to Compost:

While composting is a versatile process, there are a few items you should avoid including in your compost bin. These items can disrupt the composting process or introduce harmful elements to your garden soil:

  • Diseased Plants: Any plants showing signs of disease, like powdery mildew, should not be composted. These diseases can survive the composting process and potentially harm your garden.
  • Giant Pumpkin and Squash Vines: These bulky vines may take longer to decompose in your backyard compost. Consider chopping them into smaller pieces or utilizing an industrial composting facility.
  • Weeds Gone to Seed: Weeds that have gone to seed should be avoided, as the seeds may survive the composting process and later sprout in your garden.
  • Unsuitable Food Waste: While kitchen scraps can be great for compost, certain items should never go into your backyard compost, including meat, bones, pet waste, dairy products, and fats. These materials can attract pests and create unpleasant odors.

The Rewards of Composting:

After your compost has completed its transformation from organic matter to nutrient-rich humus, it can be used in two primary ways:

  • Mulch: Spreading a layer of compost in your garden or landscape is an excellent way to retain moisture and suppress weed growth. The mulch is a protective barrier that moistens the soil and prevents weed seeds from taking root.
  • Soil Amendment: If you’re in an area with challenging soil conditions, such as Colorado’s dry, clay-rich soil, compost can work wonders. It helps improve soil structure, enabling better water retention and enhancing airflow. It may not be rich in nutrients, but it enhances the soil’s ability to retain nutrients and moisture, creating an ideal environment for plant roots to thrive.

The Science Behind Composting:

Composting is more than mixing organic matter and waiting for it to break down. It’s a scientific process that involves the activities of microorganisms. Over time, compost becomes a homogeneous mixture teeming with microbial life. This process doesn’t necessarily add many nutrients to the soil but significantly enhances the soil’s capacity to retain essential nutrients and moisture. This, in turn, improves the overall health of your garden.

Environmental Benefits:

Apart from the garden benefits, composting at home positively impacts the environment. By diverting organic materials from the landfill, you reduce waste and conserve landfill space. This decreases the pressure on already overflowing landfills and reduces the greenhouse gases generated by the decomposition of organic matter in anaerobic conditions. In essence, you’re making a meaningful contribution to waste reduction and environmental preservation.

In conclusion, composting your yard waste is a sustainable and practical choice. It recycles organic materials, enriches your garden’s soil, promotes healthy plant growth, and reduces environmental footprint. Following the simple guidelines for what to include and exclude in your compost bin, you can embark on a journey towards a more environmentally conscious and bountiful garden. So, as you prepare to tidy up your yard this season, consider composting a rewarding and eco-friendly alternative to traditional waste disposal.


Click “DO IT FOR ME” to request a FREE quote.

Source: customer-service@bestyard.com in collaboration with Associated Landscape Contractors of Colorado

Plant in Fall. Enjoy in Spring!

  • Plant fall bulbs now for spring color.
  • The fall months, specifically September and October, are the best times to plant bulbs for a colorful display next spring.
  • To break out of their dormant state, bulbs need 12 – 14 weeks of cold temperatures (below 45 degrees).
  • There are many different bulbs to choose from including; tulips, daffodils, crocus, and alliums.
  • You can plant the bulbs individually or in a mass to create a more vibrant display.
  • Water well when you plant the bulbs in fall as this will stimulate the roots to begin their growth.
  • Keep the soil moist over the winter and continue throughout the blooming period as necessary.
  • It is a good idea to mulch the soil where you have planted the bulbs.
  • Mulch will keep the soil from drying out and help moderate soil temperature so it does not warm up too quickly.


Click “DO IT FOR ME” to request a FREE quote.

Source: customer-service@bestyard.com in collaboration with Associated Landscape Contractors of Colorado

Fall Turf Care

Lawns help cool our environment and make our backyards more enjoyable in the warm months.

Through spring and summer—especially this year—they can be the focus of our outdoor activities.

As we head into fall, take some time to change up your lawn care routine to help it continue to serve us well next year.

Here are some things to consider for fall lawn maintenance:

  • Reduce watering

Cooler nights combined with fewer hours of daylight slow lawn growth considerably and make it less thirsty.

  • Lawn aeration. 

CSU Ag extension recommends fall aeration for your turf grass.

  • Work on the weeds

What you do now to fight the weed battle will pay off next season with fewer weeds at startup.

Remember, weed control applies not only to the lawn but also to bed areas.

  • Edge the lawn with the final mowing

It’s not time yet, but when you mow the last time of the season, make that the time you also edge the lawn.  That edging will provide a neat, clean appearance throughout winter.

  • Schedule irrigation system winterization

It is better to winterize early—you might need to hand water once or twice—than to have your lawn dug up next spring to repair broken pipes!

  • Consistent plant care

Is the key to maintaining a healthy lawn, just as it is for other plants.

Weeds often result from too little or irregular watering; turf diseases also result from over-watering.

Proper watering and consistent cultural practices like weeding and aeration go a long way to reducing turf weeds and disease.

These preventive measures can reduce the need for pesticides, herbicides, and other treatments for your lawn because healthy plants will be more insect and disease-resistant.

Click “DO IT FOR ME” to request a FREE quote.

Source: customer-service@bestyard.com in collaboration with Associated Landscape Contractors of Colorado

Fall Plant Color

Spring isn’t the only time to fill your beds, borders, and containers with flowers.

Add color, texture, and cheer to your fall garden.

Pansies and Violas are the main ones for fall planting. They prefer the cool weather. They can take frosts and still bloom!

You get your money’s worth when you plant them in the fall, as they will bloom all fall, periodically through the winter, and burst out in spring!

Also, Snapdragons, Dianthus, Ornamental Cabbage, and Kale are good fall choices.

Fall mums and asters are traditional flowers at this time of the year,  but you will need to cover or protect the mums if you get a frost. It will kill mum blossoms.

Prepare the soil by adding peat moss, but not compost if you are planting pansies or violas

(they are sensitive to ammonia given off in the composting process).

You will need to water them well, then carefully check the watering for two weeks.

When it’s cooler, they may not need to be watered every day, only when the surface looks dry or, of course, if they will wilt.

Then, after a couple of weeks, they should be rooted out, and you can water as needed.

These all look great in containers with pumpkins or other fall decorations.

But if you put them in containers, they might need to be watered daily, depending on the location and temperatures.

Click “DO IT FOR ME” to request a FREE quote.

Source: customer-service@bestyard.com in collaboration with Associated Landscape Contractors of Colorado

FREE INSTANT DOWNLOAD

6 Secrets to a Lush, Green Lawn!

x Now Hiring